
Hi-if you subscribe to my blog you may have received an incomplete version of the Stuffed Zucchini Blossom post. Be sure to check back on my blog site for the complete recipe and a photo of the finished product!

first
Hi-if you subscribe to my blog you may have received an incomplete version of the Stuffed Zucchini Blossom post. Be sure to check back on my blog site for the complete recipe and a photo of the finished product!
It’s summer and my farmers market is in full swing. Tables are piled high with heirloom tomatoes, green beans, corn, peppers and of course, zucchini. We’re growing zucchini in our yard too but don’t have enough blossoms yet to stuff. I found these beauties at the market and decided to try something different. Last week I stuffed them with ricotta, dragged them through a batter and deep fried. This time I turned to a recipe that I saw on the L’Italo-Americano website. It was contributed by Letitia Mattiaci owner of All Madonna del Piatto Cooking School and Agriturismo. In her version the blossoms were baked rather than fried which I’ve done before but I’ve never used potato as a filling. We loved the finished product and I’ll definitely make these again.

I’m sharing the recipe with a few additions. I added some ricotta to the potato mixture and drizzled the stuffed blossoms with olive oil (didn’t use butter) and sprinkled some bread crumbs and parmesan over top. I baked mine in a ceramic dish for about 20-25 minutes.

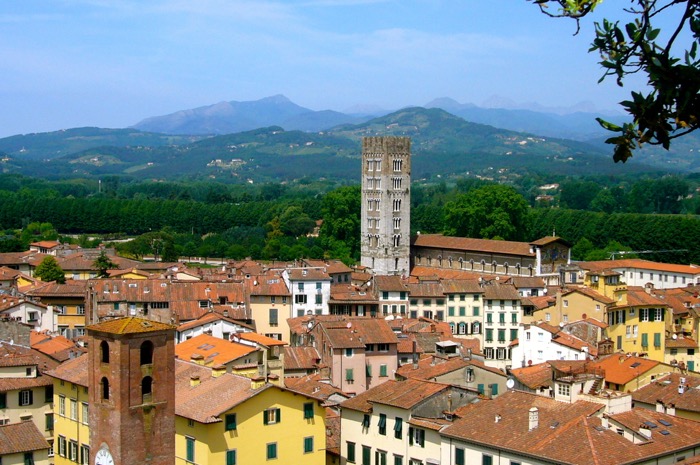
It’s heartbreaking to announce, but the May 2021 tour has been rescheduled due to the pandemic. I’m already dreaming of my return to Lucca this autumn. Come along and be prepared for amazing food, new friends, stunning scenery and lots of laughs. I’m available to help you with your travel plans so get in touch!
Dates: October 2-9, 2021
Total Price Per Person: $3500 (private bedroom)
Deposit: $975 is due within seven days of making your reservation. Balance is due 90 days prior to the first day of the trip. Deposit is non-refundable.


The Details:
We will be staying in a beautiful, large apartment in a recently restored 15th century building located in the heart of the historical center of Lucca. It’s just a short walk to the ancient walls surrounding the centro storico-the perfect place for a walk or bike ride with a bird’s eye view of the town. Our week will focus on food and wine of Lucca and the surrounding area. No trip to Tuscany is complete without a visit to Florence, so we will spend a day there exploring, tasting and shopping!


What’s Included:
Cooking class with participation with local Lucchese chef
Day trip to Florence with a guided food tour of specialty food shops in the centro, time for shopping
Day trip to the countryside of the Garfagnana to visit a farm where we’ll spend the day with Paolo (the baker for his town) where together we’ll make our own loaves in the wood fired oven and then sit down to a lunch featuring dishes made with farro grown on the farm. On our trip back we’ll stop stop at the Devil’s Bridge on our way down the Serchio River on our return to Lucca
Day trip to Montecarlo to visit a winery with tasting and lunch
A visit to Lucca’s Palazzo Mansi
All transportation for day trips out of town
Seven nights’ accommodations in private bedroom
All breakfasts
5 lunches and 6 dinners
Wine with meals
Water, coffee, wine and snacks stocked in the apartment


It is strongly advised that you purchase trip cancellation insurance as cancellation fees apply regardless of reason for cancellation. Check out information at www.insuremytrip.com.


What’s Not Included:
Airfare, transfers from airport to and from Lucca, travel insurance, phone calls, laundry services, alcoholic beverages other than host ordered. Schedule subject to change.
Contact me at paninigirl4@gmail.com with questions or to make a reservation.
Like everyone else who grows zucchini, I’m always looking for a new recipe. We’ve had frittatas and gratins. I’ve stuffed, grilled, sauteed and made pancakes. I’m sort of happy that it’s time to move on to fall vegetables, however I’d be happy to have these fritters on my table any time of year.
To be honest I’ve been searching for a recipe for a savory ricotta fritter after having them at restaurant in Bevagna (Umbria) some years back. We were staying at Genius Loci , a charming inn located not far from town. We drove in and parked in a lot outside the walls. After wandering around we found the restaurant, had a lovely dinner and when we left it was pouring, I mean really pouring. What should have been a five minute walk to the car turned into an hour of walking in circles. Even after asking directions we ended up not at the car park, but back at the restaurant!
These fritters are pretty close-with the addition of the zucchini- to the ones I ate on that rainy night.
Zucchini-Ricotta Fritters
2 medium zucchini (about 7 ounces), coarsely shredded
2 garlic cloves, very thinly sliced
3 scallions, very thinly sliced
2 eggs beaten
1/2 cup ricotta
2 teaspoons finely grated lemon zest
3/4 cup flour
Olive oil (I used canola) for frying
Lemon wedges for serving
In a large bowl combine the zucchini, garlic, scallions, ricotta, eggs, lemon zest and 1 teaspoon each of salt and pepper. Stir well and then stir in the flour until just incorporated.
Line a baking sheet with paper towels. In a large skillet heat 1/4″ oil until shimmering. Working in batches add 2 tablespoon mounds of the zucchini batter to the hot oil, spreading them to form 3″ fritters. Fry over moderately high heat, turning once until browned and crisp, about 3 minutes. Drain the fritters on the paper towel and serve right away with lemon wedges.
The fritters can be made ahead and keep at room temperature for up to 2 hours and recrisped in a 325 degree oven.


It was two years ago this month that we visited Ferrara. Located only about half hour by train from Bologna this city is definitely worth a visit. It reminded me a lot of Bologna, only smaller and without all the tourists.


The city has one of Italy’s best preserved Medieval neighborhoods. The quarter is a mix of churches, palaces and ordinary houses. I loved the variety of arches, windows and shutters lining the jumble of streets.


Right in the center of town there’s the castle built by the Este family complete with a moat. If you’re in Ferrara definitely tour the castle. Be sure to check out the dungeon!


Similar to Lucca, Ferrara is also surrounded by a wall. Yes you can walk up there, but it’s not paved like Lucca’s and it’s quite a bit longer, although are a few interruptions.

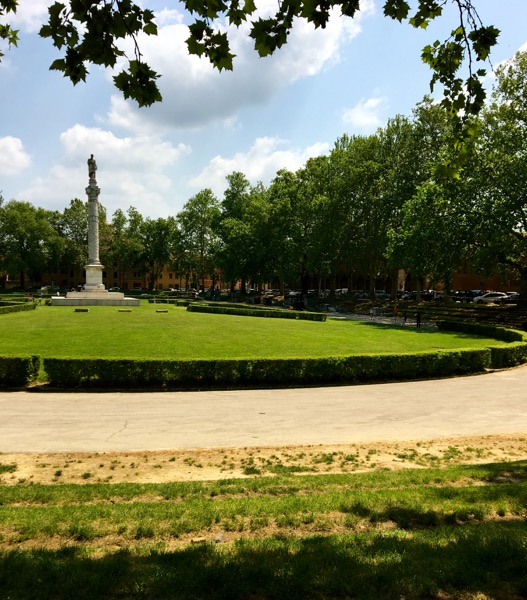
While walking around the neighborhood near our apartment in search of a pizzeria we came upon this track built around a grassy area. Later we discovered that this is where the city’s annual palio takes place. You’ve probably heard of the famous palio (horse race) in Sienna, but Ferrara’s is the oldest in the world. It usually takes place the last Sunday in May, but it’s doubtful that this festival will take place in just a few short weeks.
A good portion of the centro is free of automobiles and there are bikes are everywhere. Since it’s a very flat area it’s the perfect mode of transportation.


Truth be told we didn’t have enough time in this lovely city and plan on a return visit. Oh, and the food is similar to and just as good as Bologna’s.

The first time I tasted a sformata we were in a trattoria in Acqui Terme in Piemonte. I ordered it not knowing exactly what it was and was pleasantly surprised when I was served a light and creamy vegetable custard. After returning home I searched for recipes and made one with spinach. That was quite some time ago and I then I apparently just forgot about them.
I’ve been reading a lot of cookbooks in my abundant spare time and saw this recipe in Katie Parla’s book Tasting Rome. The beauty of a sformata is that it’s texture is similar to a souffle, but without all the work and the worry.

Are you familiar with romanesco? It’s sort of a cross between cauliflower and broccoli. I’ve never seen it in the grocery store and only one farmer at the market had exactly one romanesco which I quickly grabbed!

Sformatini di Broccolo Romanesco (adapted from Tasting Rome)
Core and trim the romanesco and separate it into florets; you should have about 5 cups. Steam until tender, about 10 minutes. Cool, then coarsely chop (to yield about 3 cups).
Preheat the oven to 320 degrees. Use the vegetable oil to grease the insides of the ramekins. Line a roasting pan with a folded dish towel and arrange the ramekins on top of the towel.
Bring a large kettle of water to a boil over high heat.
Meanwhile, heat the extra-virgin olive oil in a medium skillet over medium-low heat. Stir in the onion; cook for about 8 minutes or until softened, stirring occasionally. Add the cooked romanesco and wine; cook for about 6 minutes, stirring occasionally.
Transfer the mixture to a food processor or blender (with the center knob of its lid removed, so steam can escape). Puree until very smooth, for several minutes, stopping occasionally to scrape down the sides of the food processor bowl or blender jar.
Whisk together the eggs and cream in a large bowl and stir in the pecorino Romano, then pour in the blended romanesco mixture, stirring to incorporate. Divide the custard mixture among the ramekins, leaving about 1/4 inch of head space.
Pull the middle oven rack forward just enough to slide the roasting pan onto it, then carefully fill the pan with the just-boiled water so it comes no more than halfway up the sides of the ramekins. Bake for 40 to 45 minutes or until the custards are a bit jiggly in the center and a knife inserted into the center of them comes out clean.
Carefully transfer the roasting pan to the stove top (off the heat). Let it sit for 10 minutes, then use coated tongs to transfer the ramekins to a cutting board to cool further.
To serve (warm or at room temperature), invert and gently unmold each sformatino.

The one bright spot in this incredibly strange time is that my local farmers market is sill up and going full force. Most of the other markets in the San Diego area have been closed for the past five weeks so I feel very lucky to be able to support these small family owned farms.
Just about every week I purchase a bunch or two of chard from a brother and sister team that I’ve been buying from for years. Usually I saute the greens with a little garlic and red pepper flakes, but when I saw this recipe in Katie Parla’s book Tasting Rome I knew I had to make it. I had all the ingredients on hand, or so I thought until I took the puff pastry out of the freezer and it was a soggy mess. Three stores later looking for the pastry and I was ready to go. I guess I should add here that three stores later with J. shopping for me and I was ready.

Katie explains in her book that this torta is often found in Rome’s wine bars and bakeries. It’s just the sort of thing that I would buy in an instant if I saw it on display. It’s perfect with a glass of wine or prosecco or makes a nice light lunch.
Torta Rustica
1 tsp sea salt, plus more for salting the water
1 pound fresh spinach leaves
1 pound fresh chard
¼ pound dandelion greens
2 tbsp extra-virgin olive oil
1 onion, coarsely chopped
3 tbsp chopped fresh flat-leaf parsley
½ carrot, finely grated
½ pound ricotta
1¼ cups grated Parmigiano-Reggiano
4 large eggs
Freshly ground black pepper
1 pound puff pastry store-bought or you can make your own
*** My torta was done in about 30 minutes

Twenty years ago when we started planning our first trip to Italy J. proclaimed that he didn’t care about visiting Rome. He thought it would be too big and too noisy. Knowing that we could only see so much in two weeks I wasn’t bothered that we wouldn’t make a stop in Rome. Somehow I knew we would eventually spend time there.

Two trips later and Rome was on our itinerary. Yes it is big and it can be noisy especially if your hotel is right on a famous piazza, but it is one of the most fascinating cities in the world.

Since then we’ve returned time after time and now when traveling to Italy we prefer to start in Rome for a few days and then end up there before heading home. There’s endless sites to see, neighborhoods to explore and of course meals to eat. No matter how much you see, there’s always much more to discover.


We’ve stayed in various areas of the city and discovered that we love the Testaccio neighborhood. A food tour by Eating Europe was our introduction to this un-touristy part of Rome and since then we’ve made it our base.


Home to a variety of family run trattorias serving Roman specialties Testaccio also boasts a well known Mercato with stalls selling produce, meat, cheese, fish, bread, pasta and prepared foods. Like most local markets there are also vendors selling clothing, shoes and household items.


Just across the river is the popular neighborhood of Trastevere. One of my absolute favorite restaurants in the city is located there-La Tavernaccia da Bruno. Their suckling pig with roasted potatoes is hard for me to pass up. If you’re there on Sunday definitely order the lasagna.


Here’s to the hope of making new Roman memories this October…

As we only had two days in this part of Puglia we didn’t get to the famous town of Alberobello. As that town is well known for its concentration of trulli, it’s also known to be quite touristy so we decided to save it for another time. Instead we drove to Locorotondo which we could see from our roof deck.


This white washed town was bedecked with plants spilling over balconies and framing doorways. It was another picture perfect day and the combination of the white buildings, blue skies and colorful flowers proved to be enchanting.


The streets were pretty much deserted since it was market day and most of the residents were busy shopping for their fruits, vegetables and other household items. I was more interested in the mercato all’aperto than I was in the churches and quaint buildings. We knew we wouldn’t have to time to cook a meal with the stunning produce, but we did purchase olives, bread and cheese-just the basics!


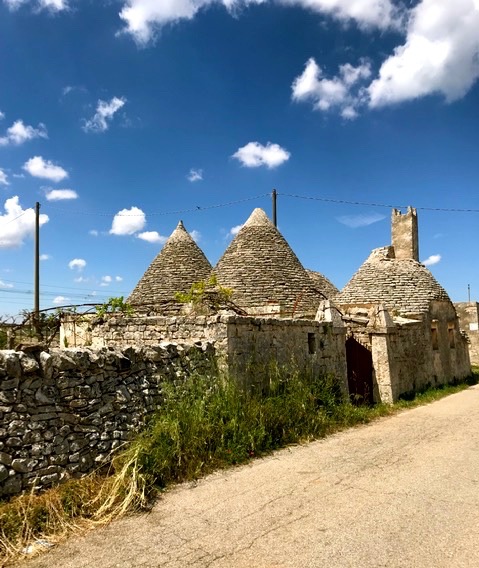
Leaving town we passed this cluster of ancient trulli. Driving the back roads between Locorortondo and Cisternino we passed similar scenes in addition to once again getting hopelessly lost!

Driving south from Calitri towards Lecce we passed fields with olive trees, but it wasn’t until we were off the highway heading towards Cisternino that we came upon the ancient trees that Puglia is known for.


The gps directed us onto a dirt road through a grove of trees lined by short rock walls. It was like nothing we’d ever seen before. The trunks were twisted around and around. Some were even knotted. There was no one else around and it was as if we had discovered some magical place.

As we got closer to Cisternino trulli started to appear in the fields. I was fascinated! Some of them seemed to be incredibly old and were obviously abandoned. Others were painted white and had been incorporated into other buildings being used as homes. I couldn’t wait until we found what would be our trullo for the next few days.


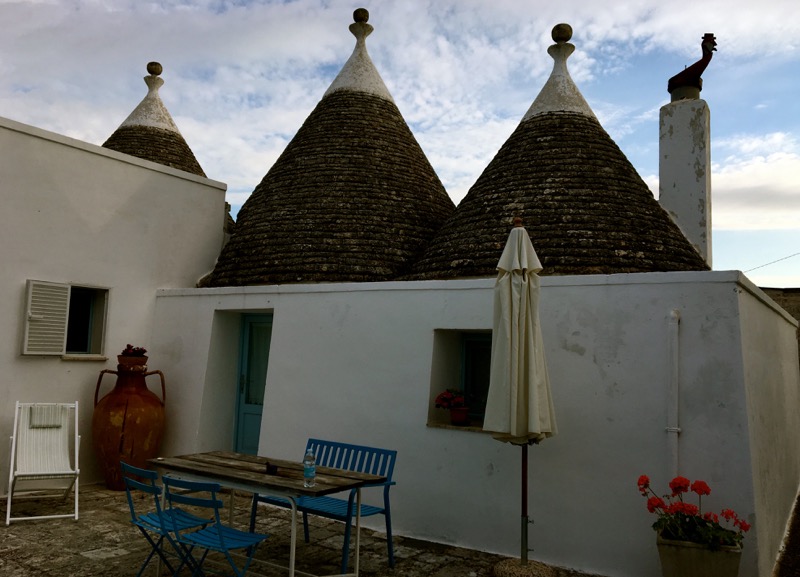
I won’t go into the long story of us actually finding our trullo. Suffice it to say there’s not a lot of signage out in the countryside and we learned that your gps may to get you to where you want to go. Maybe because it was so hard to find that when we pulled into the driveway I could barely contain myself. Just look at this patio! I was immediately smitten by the shades of blue and flowers spilling out of ceramic pots. The interior was equally as charming.


I couldn’t wait to climb the steps to the roof top deck which offered an incredible view of the valley and to the town of Locorotondo off in the distance. The deck was our go to spot for cocktails in the evening.


One evening we opted to eat in and were treated to a typical Pulgiese meal prepared by Giovanni, son of the owner. B & B Piertaviva is located a few miles outside of Cisternino and we will be there this fall if at all possible.
I took this last shot at dawn as we were reluctantly leaving for the airport. The bright side was that we weren’t leaving Italy, but heading to Rome!
